Monday 24 October 2016

Diwali Decor


        A few days more and India and many parts around the world are going to celebrate the festival of lights! And yes, it is exactly as it's names sounds. From roads lined with festively lit shops to lantern filled balconies, rangolis at the doorstep to lamps in  the sky, Diwali is one festival that inspires so much decor. I thought I'd discuss a few Diwali decor ideas on today's post, so you and me both can turn our homes into a light filled wonder this season.


  • Pick a corner in your house and hang lamps at different heights to create a cascading light effect. These could be moroccan lamps, metal lanterns or simple glass lights


  • Get your DIY thumbs out and start making some paper lanterns. Pom poms on paper lanterns, cut out lanterns or painted ones, the internet has the key to them all!


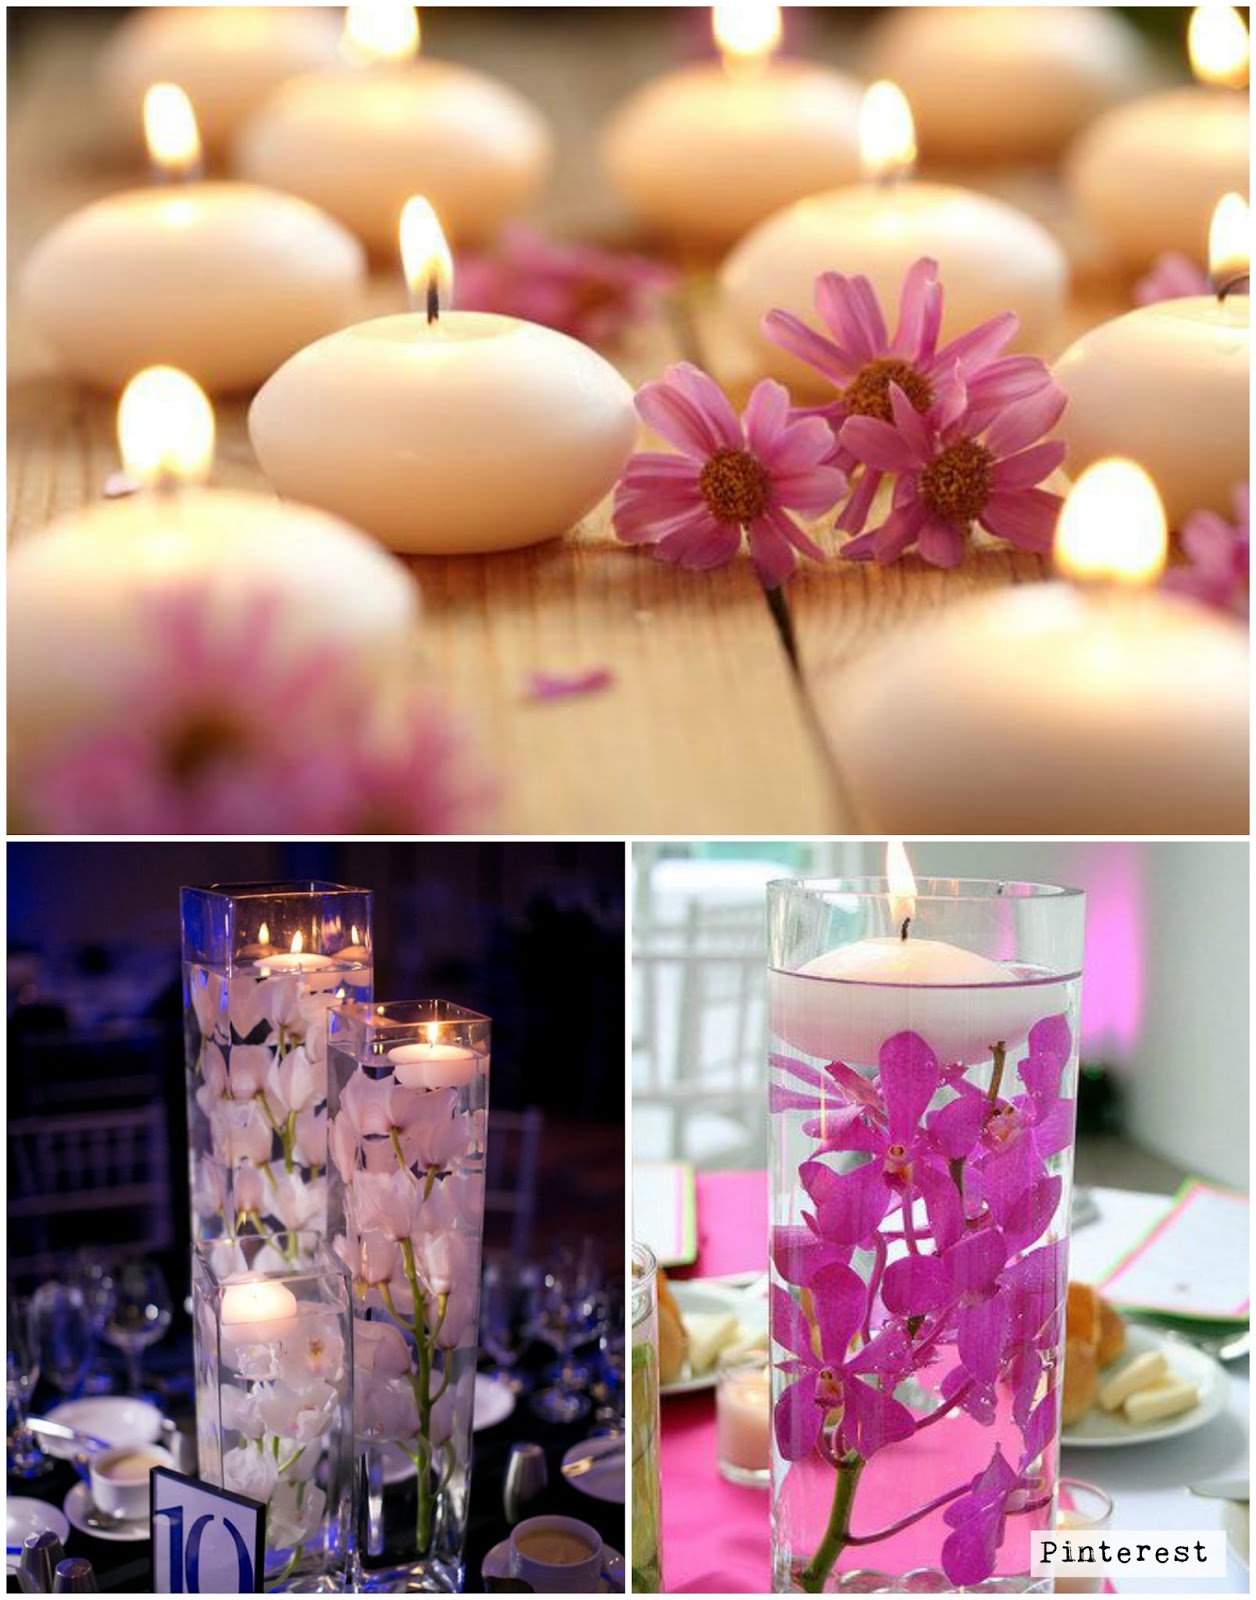
  • Playing with flowers and candles are your third lighting option this season. Make a candle setting on your console, centre table or dining table and scatter petals of your favorite flower around. Placing some floating candles and flowers in a glass bowl or jar is an interesting option too. Bowls of pot pourri around the house can also add to the festive vibe.

  • Diwali isn't Diwali without diyas. With diyas, the age old traditions work very well even today. Place a line of diyas by your balcony or window or incorporate a few into the rangoli design at your doorstep. If you have steps leading to your front door, place a diya at the corner of each step. That's saying "Happy Diwali" right at the front door!


  • Geometric printed cushions or sequined cushions are easy add-ons to let in the Diwali vibe.


  • Hang garlands of flowers at your windows, You can go traditional and go with the classic orange garlands or you can pick a flower more suited to your house theme. Try your hand at a completely floral rangoli design too!

  • Opt for lighter curtains this season so that the light can enter into your house. Shimmery, glistening fabrics work well too.

   
Hope your house is filled with the light of love and happiness this season! Happy Diwali!


Tuesday 18 October 2016

"Fall"ing for Wreaths!


       It is that beautiful season called "Autumn" and golden brown leaves seem to be falling everywhere, rust seems to have become the color of the season and pumpkins have become your easiest style element. While this must actually be happening in other parts of the globe, in Mumbai the only place where this seems to be happening is on our Pinterest boards!

       How about we make fall an additional season in Mumbai and put all those Pinterest ideas to use? The easiest way to feel "Autumny" is to add a fall-themed wreath to your front door. That way, you get reminded of orange brown leaves and such while your neighbors do too!

1. Burlap Wreaths
            Burlap or Jute are perfect materials to complement the rustic warm theme that fall is all about. You can use the cloth as a base for your wreath and either wrap it simply around an iron frame or create a ruffle around the frame. Add dried or artificial flowers in burnt orange, maroon and burgundy shades either at a corner or on top. You can even keep the wreath completely burlap free save for a huge burlap bow. Colored burlap with neutral flowers is an option here too.

2. Wooden Wreaths:

       Twigs of wood, flexible dried stems or wooden trunk edges work equally well in Autumn wreaths especially if you want to go all natural. Here too flowers make great fillers. The trick here is to arrange the wood in a quirky unique way.

3. Chalkboard Wreaths:

     It's always fun to add a touch of word art to your decor. Take some inspiration from our last week's post and turn an old photo frame or wooden board into a chalkboard working your wreath around it!

4. Not-So-Round Wreaths:

      Put on your thinking caps for this one and try to use all these materials but create a wreath that steers clear of the round shape. This one's a toughie but here are some images for inspiration.

     Have a happy fall!


Tuesday 11 October 2016

Chalk it up!

       Chalkboard paint seems to be making it's way across all types of home decor these days. And why not? Chalkboard surfaces offer color freedom across the home and a chance to incorporate inspiring quotes, daily tasks and cute messages into your home decor. Pick an old photo frame, a spice rack or an old painting and turn it into a piece of chalk board art!

     Here's a few steps to get on this fun project:

  • Firstly, make sure your surface is free from holes, nails or other protusions or dents. Try and make it as smooth as possible.
  • Apply a coat of primer first, making sure this coat dries before the next step.
  • You can now make your portions of 1 cup paint and 2tbsp unsanded grout. This mixture dries quite quickly hence even if you need alot of paint stick to making smaller quantities at a time.
  • Apply your paint onto the surface with long strokes. Let this coat dry (for upto two hours) and now apply your second coat. Repeat this 4-5 times for a solid long lasting finish.
  • You are now ready to get the chalks out and get your word art on!
These pictures are sure to give you inspiration and guide you along the different parts of the house chalboards can be displayed!

Living Room:


Kitchen:


Dining Room:


Bedroom:

                           
Home Decor:

Here's a fun decor idea that can remind you of school days, keeps track of your daily tasks, acts as an inspiration and is visually appealing! 

Tuesday 4 October 2016

Table Top Rules!

      Take a look around your house today. I can guarantee you you'll find atleast one table top surface being utterly wasted in the decor sense. And isn't that true for all our homes? The number of flat surfaces providing ample opportunities for style in and around our houses are countless! From coffee table tops to entry way consoles, kitchen counters to writing desks, tabletops are present all around our homes. The question remains: Are we using them the right way? Or are they turning into dump stations for missing keys and forgotten books and yesterday's newspapers?

      Let's take control of the table top today and turn it into a style station (you might be able to store your junk on it with style too!).

The Rule of Threes: 

      This rule suggests adding three style elements to a table top in groups of threes and in three sizes: Small, Medium and Large. They could be vases, lamps, statues or bookends.


The Au Naturel Rule:

      This rule is a classic and one that must be applied to atleast one surface of your home. The floral twist can be added to any table top amongst books, lights or vases. Add them fresh, dried or growing out of a pot or terrarium.


The Rule of Lights and Lamps:

       It's always fun to play around with your lamps and add them as a focus element on your table. I'd suggest if you're making your lamp a statement piece, work in a few smaller decor items to complete the look. Using two similar lamps for a balancing act is also a clean and easy look to pull off.


The Scatter Rule:

       Be warned, this rule is a tough one to pull off but well worth the practice. Mix up design rules, decor items and style factors with this one. Here you can add books, light fixtures, smaller decor accessories and anything to create a sort of scattered (but carefully styled and laid out) look.


The Secret Storage Rule:

       Still want your table tops to serve as storage surfaces for your books, keys and other stuff? Then make them do just that! But with a lot of style, mind you! Add in storage units like rustic baskets or geometric pen stands, stylish book ends or elegant trays and make storage a statement!


      And there you have it! The table top rules! Let us know if you'll have any other tips :)